Link Management
How to use Link Tags in URL Shortify
Why Use Link Tags?
Organize your short links with color-coded tags. Filter, sort, and group links by tag directly from the links table.
How It Works
Tags are custom labels you create and assign to one or more short links. Each tag has a name, optional description, and a color. On the links table, tags appear as colored badges — clicking a badge instantly filters the table to show only links with that tag.
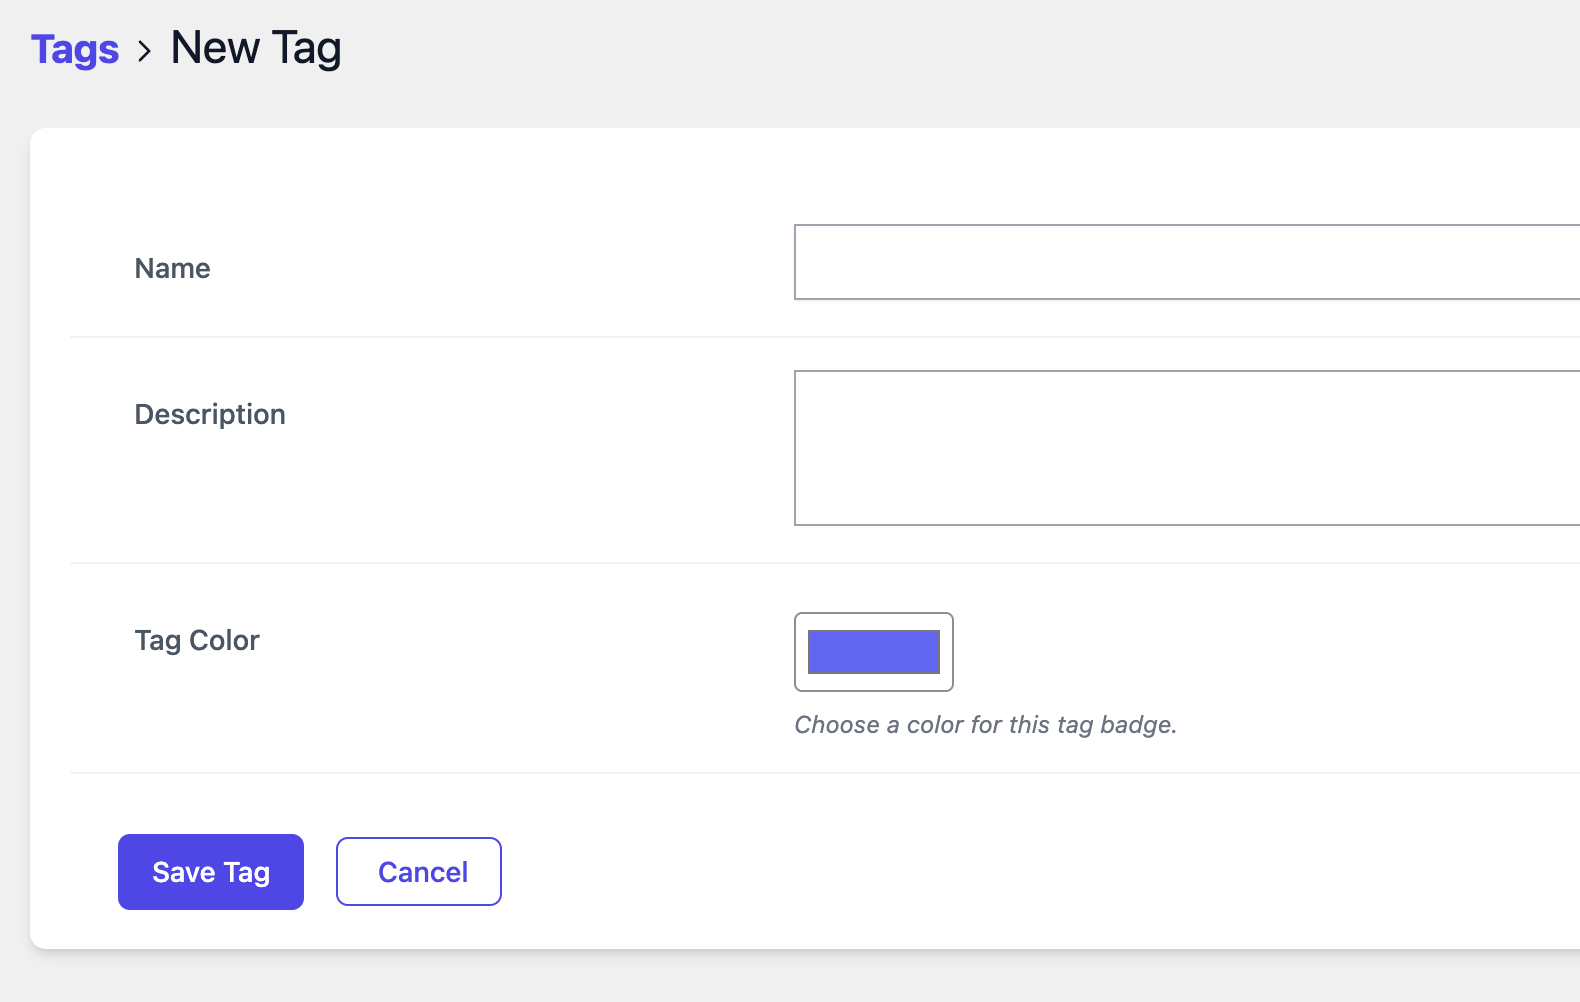
Create a Tag
- Go to URL Shortify → Tags.
- Click Add New.
- Fill in the tag form:
| Field | Description |
|---|---|
| Name (required) | The tag label (e.g. Social Media, Affiliate, Campaign 2024) |
| Description (optional) | Internal notes about this tag |
| Color | Click the color swatch to pick a hex color (default: indigo #6366f1) |
- Click Save.
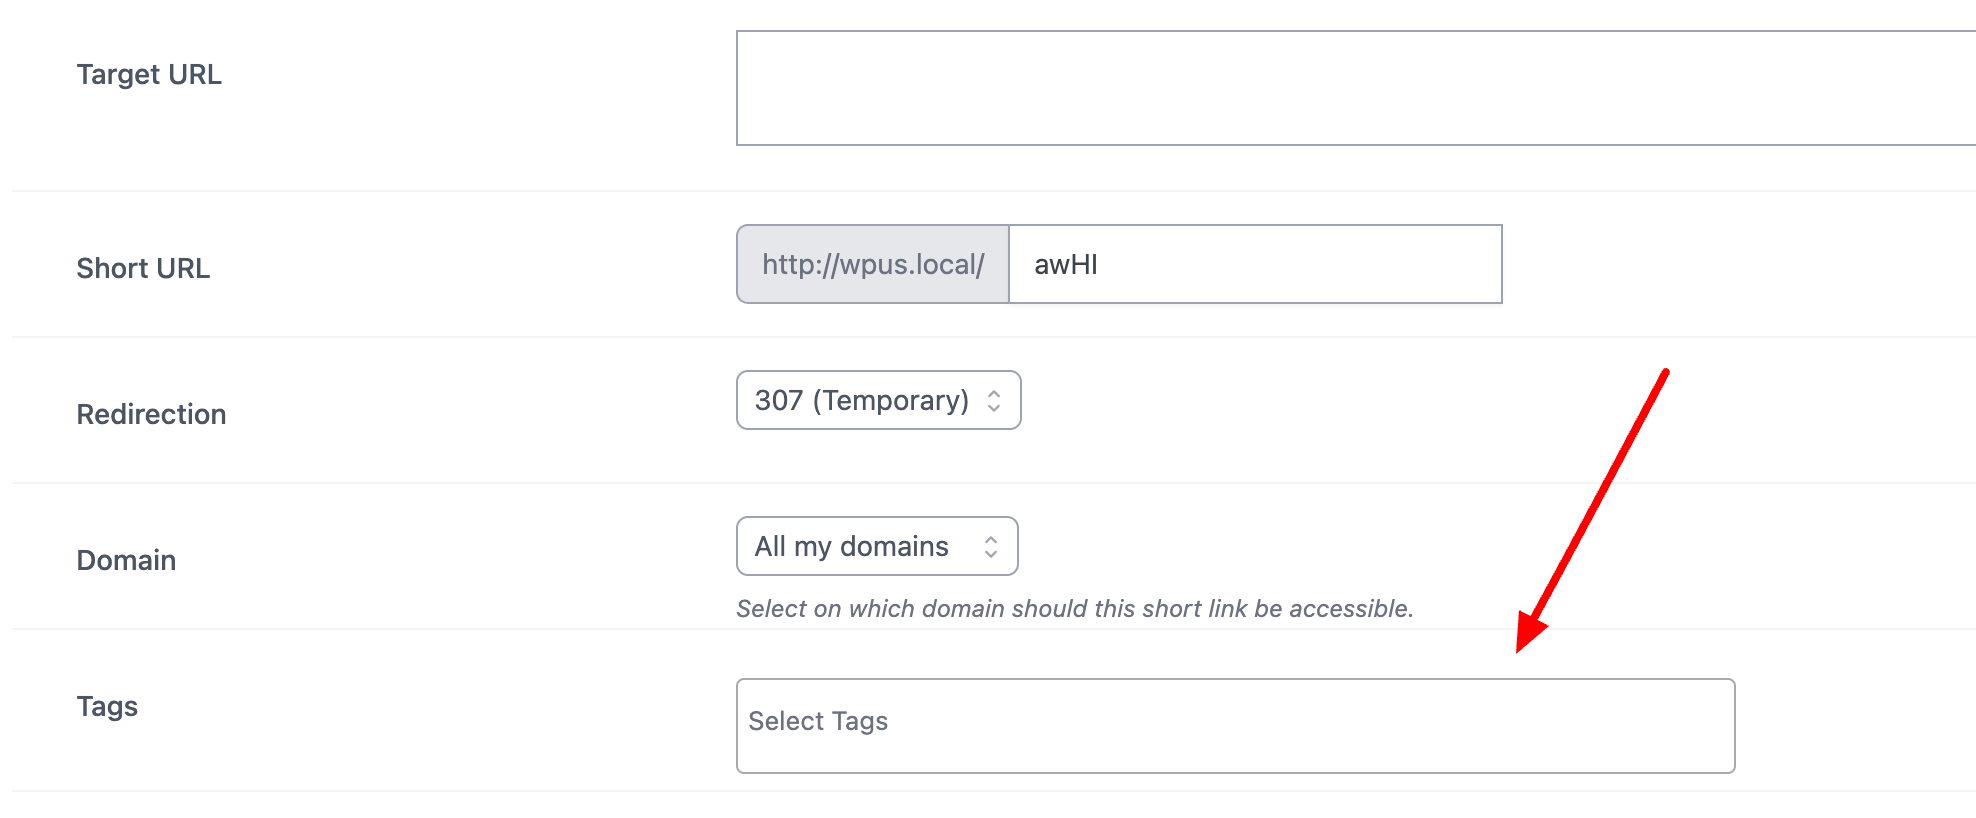
Assign Tags to a Link
When Creating a New Link
- Go to URL Shortify → Links → Add New.
- Scroll to the Tags field.
- Click the dropdown and select one or more tags.
- Save the link.
When Editing an Existing Link
- Open any short link for editing.
- Find the Tags multi-select dropdown.
- Add or remove tags as needed.
- Save the link.
You can assign multiple tags to a single link. A link with no tags will show a dash (
—) in the tags column.
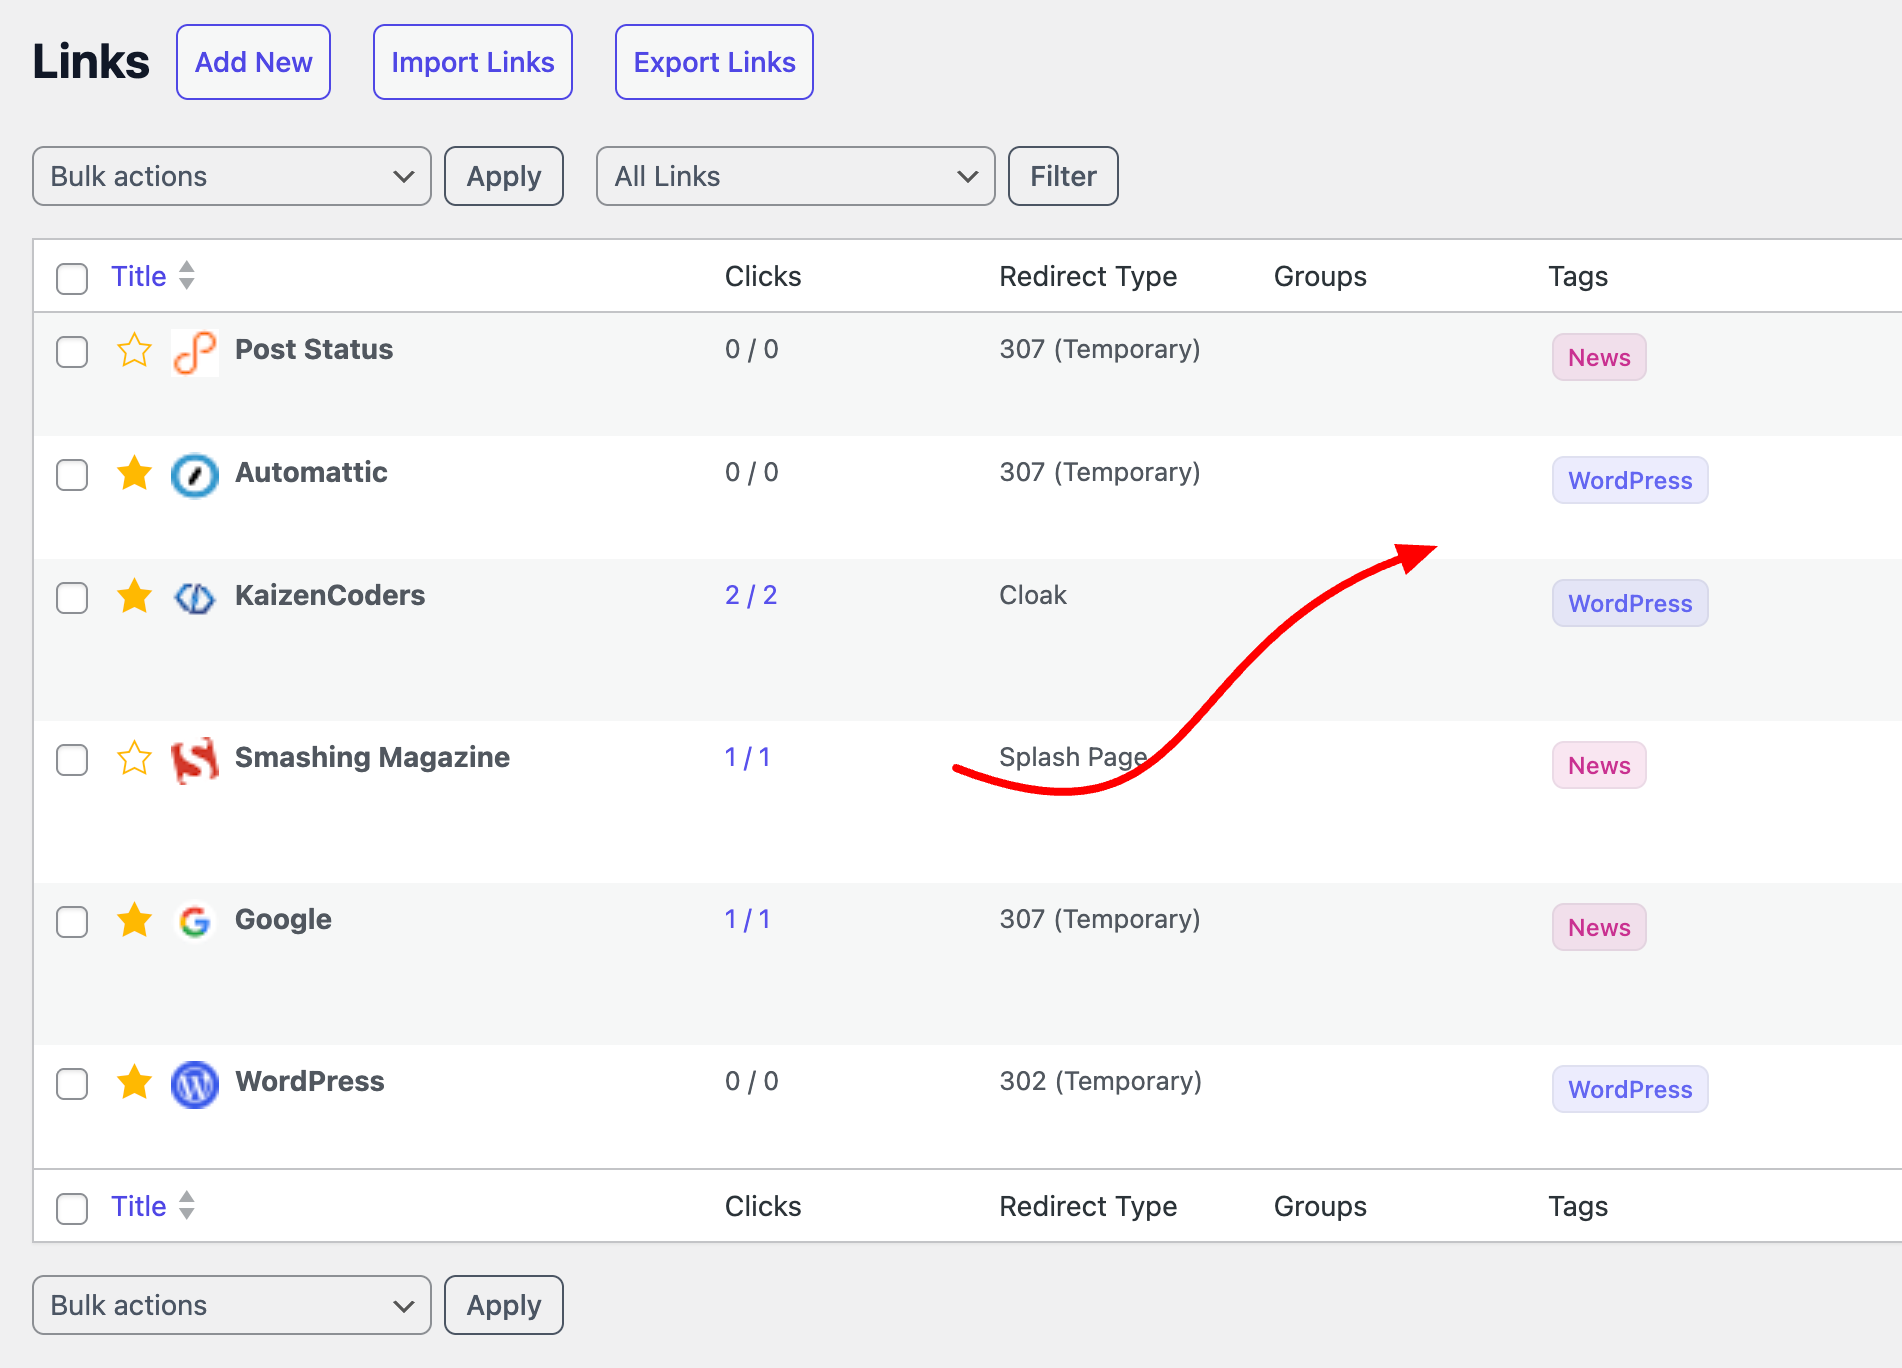
View Tags on the Links Table
Tags appear as colored inline badges in the Tags column of the links table. Each badge shows the tag name with the color you chose.
Filter Links by Tag
Method 1 — Click a tag badge: Click any tag badge in the links table to instantly filter the table to show only links with that tag.
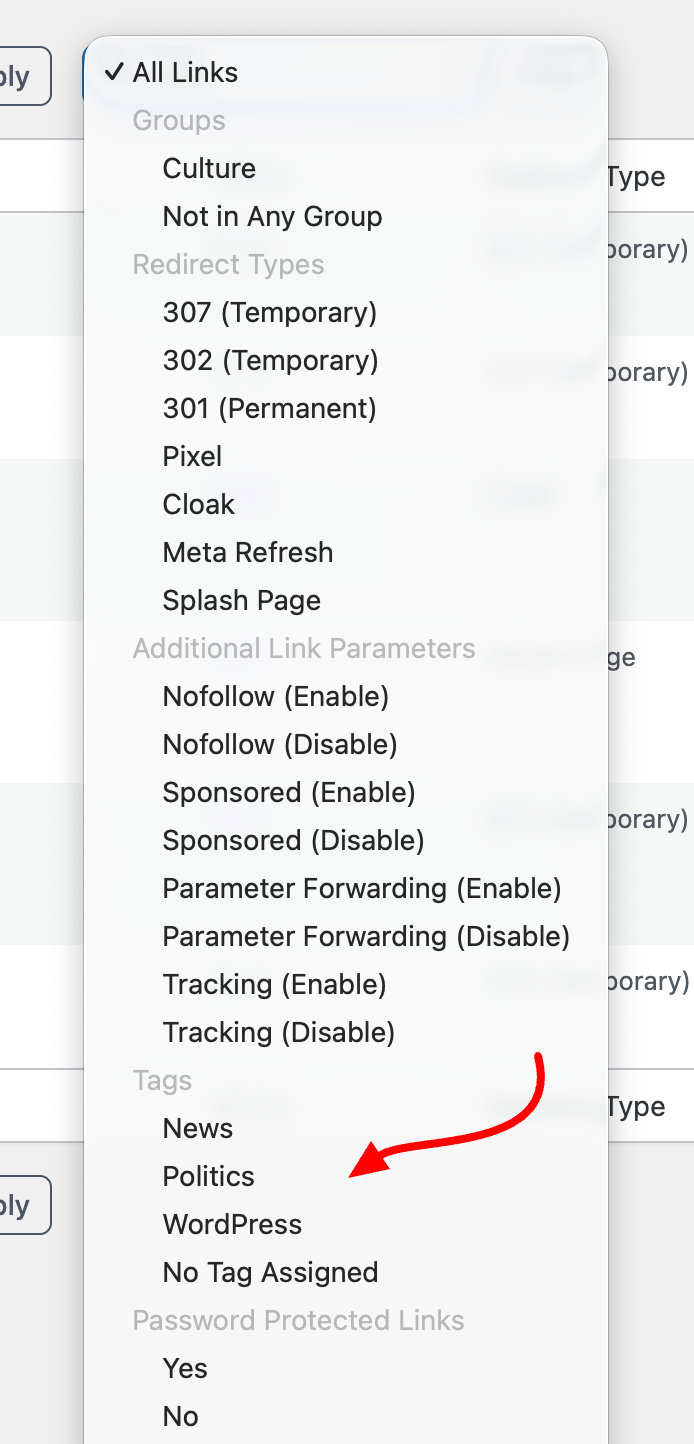
Method 2 — Using Filter Dropdown:
- Click the Filter dropdown above the links table.
- Choose a specific Tag from the filter options.
- Click on to apply the filter and view only links assigned to that tag.
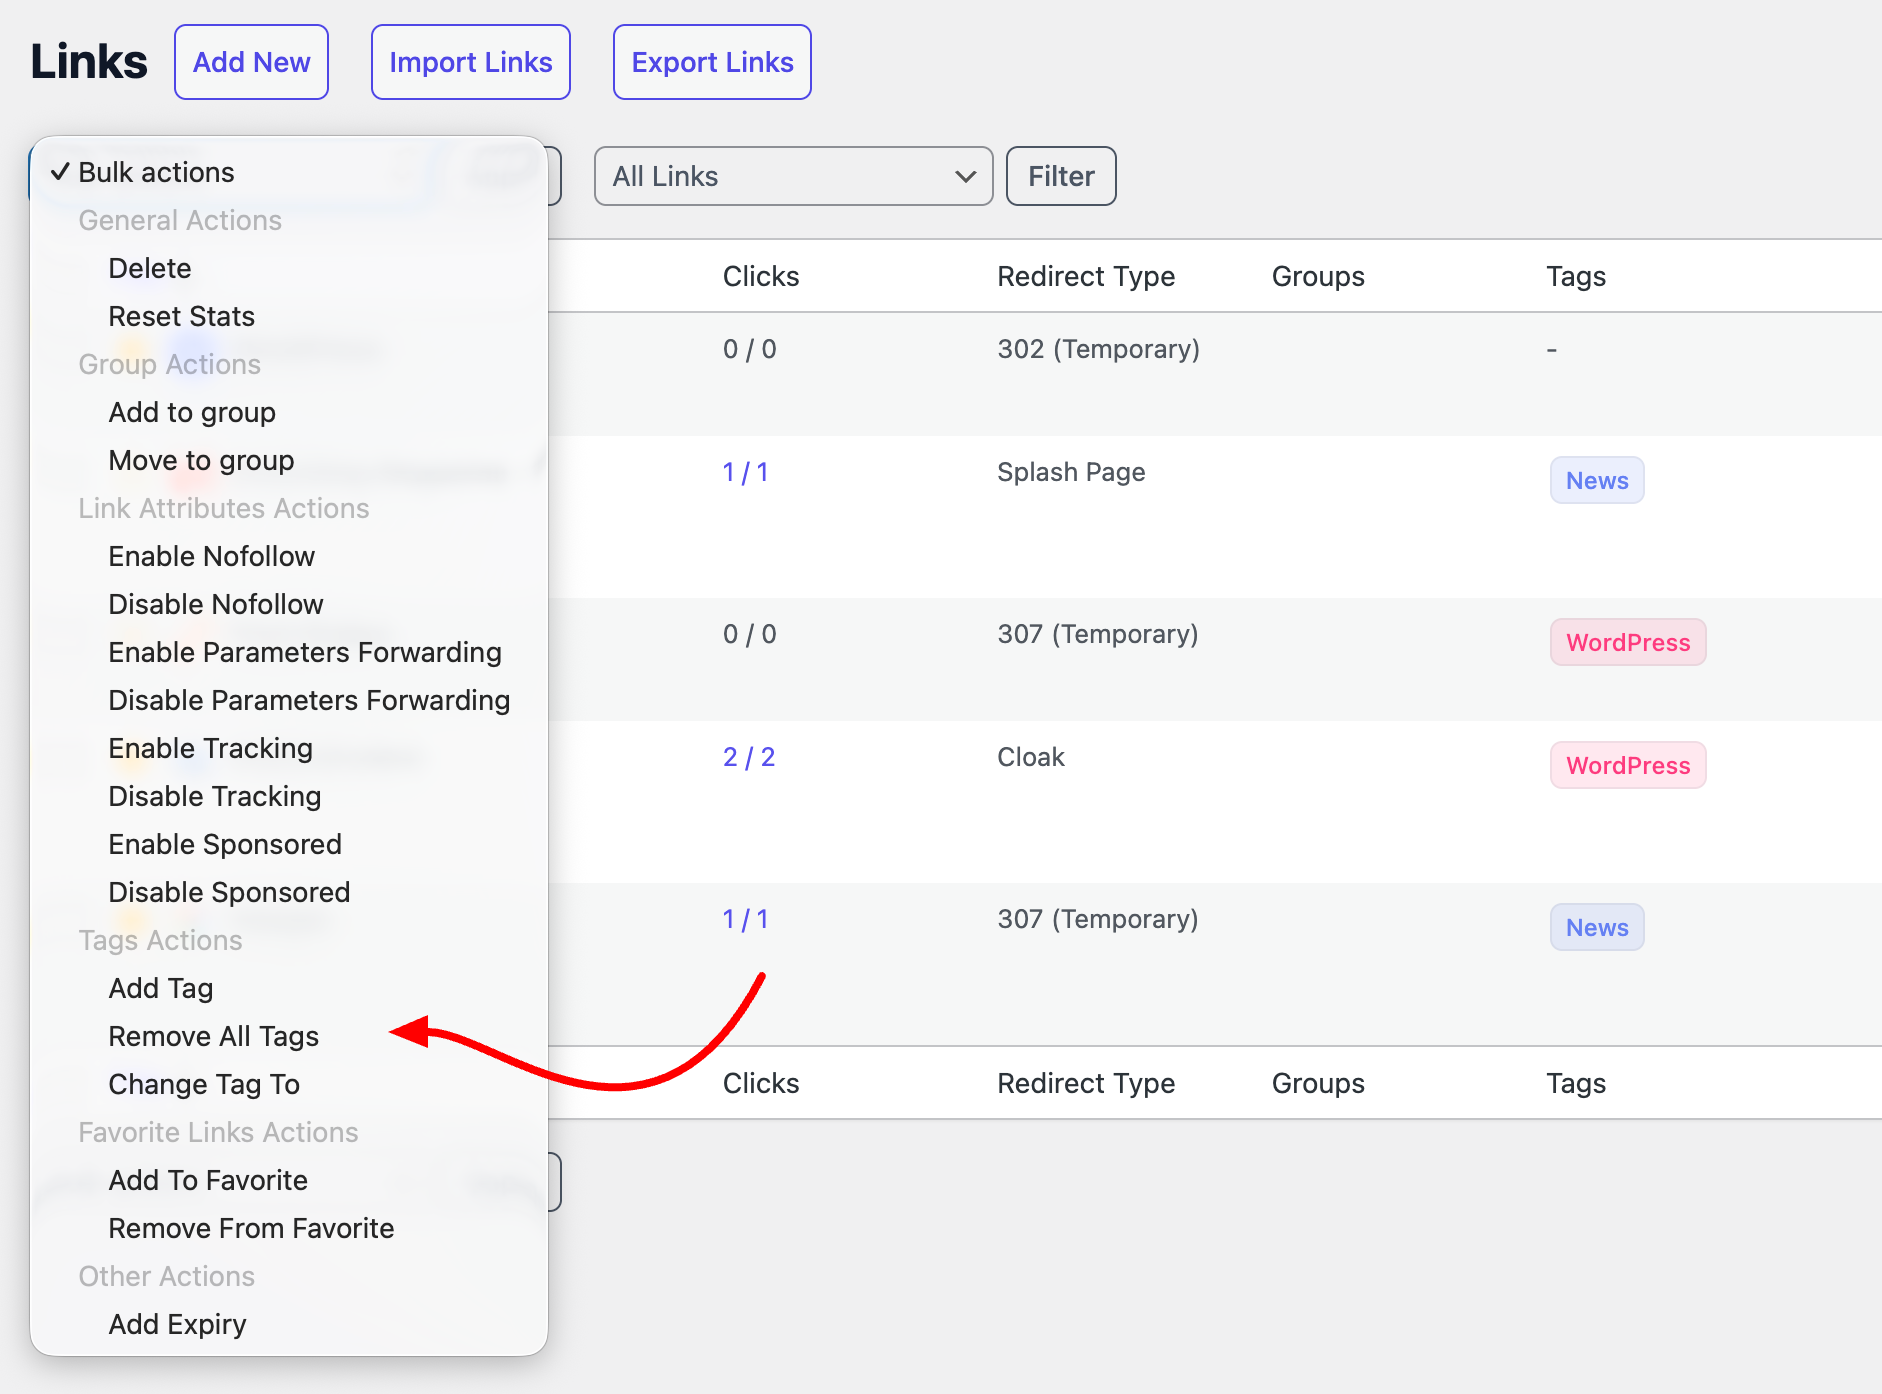
Bulk Add/Change/Remove Tags on Links
- Select multiple links using the checkboxes on the left.
- Open the Bulk Actions dropdown.
- Under the Tag Actions group, choose:
- Add Tag — Add a tag to all selected links (does not remove existing tags)
- Change Tag — Replace all existing tags with a new tag for selected links
- Remove Tag — Remove all tags from all selected links
- Click Apply.
Manage Tags
Go to URL Shortify → Tags to manage all tags.
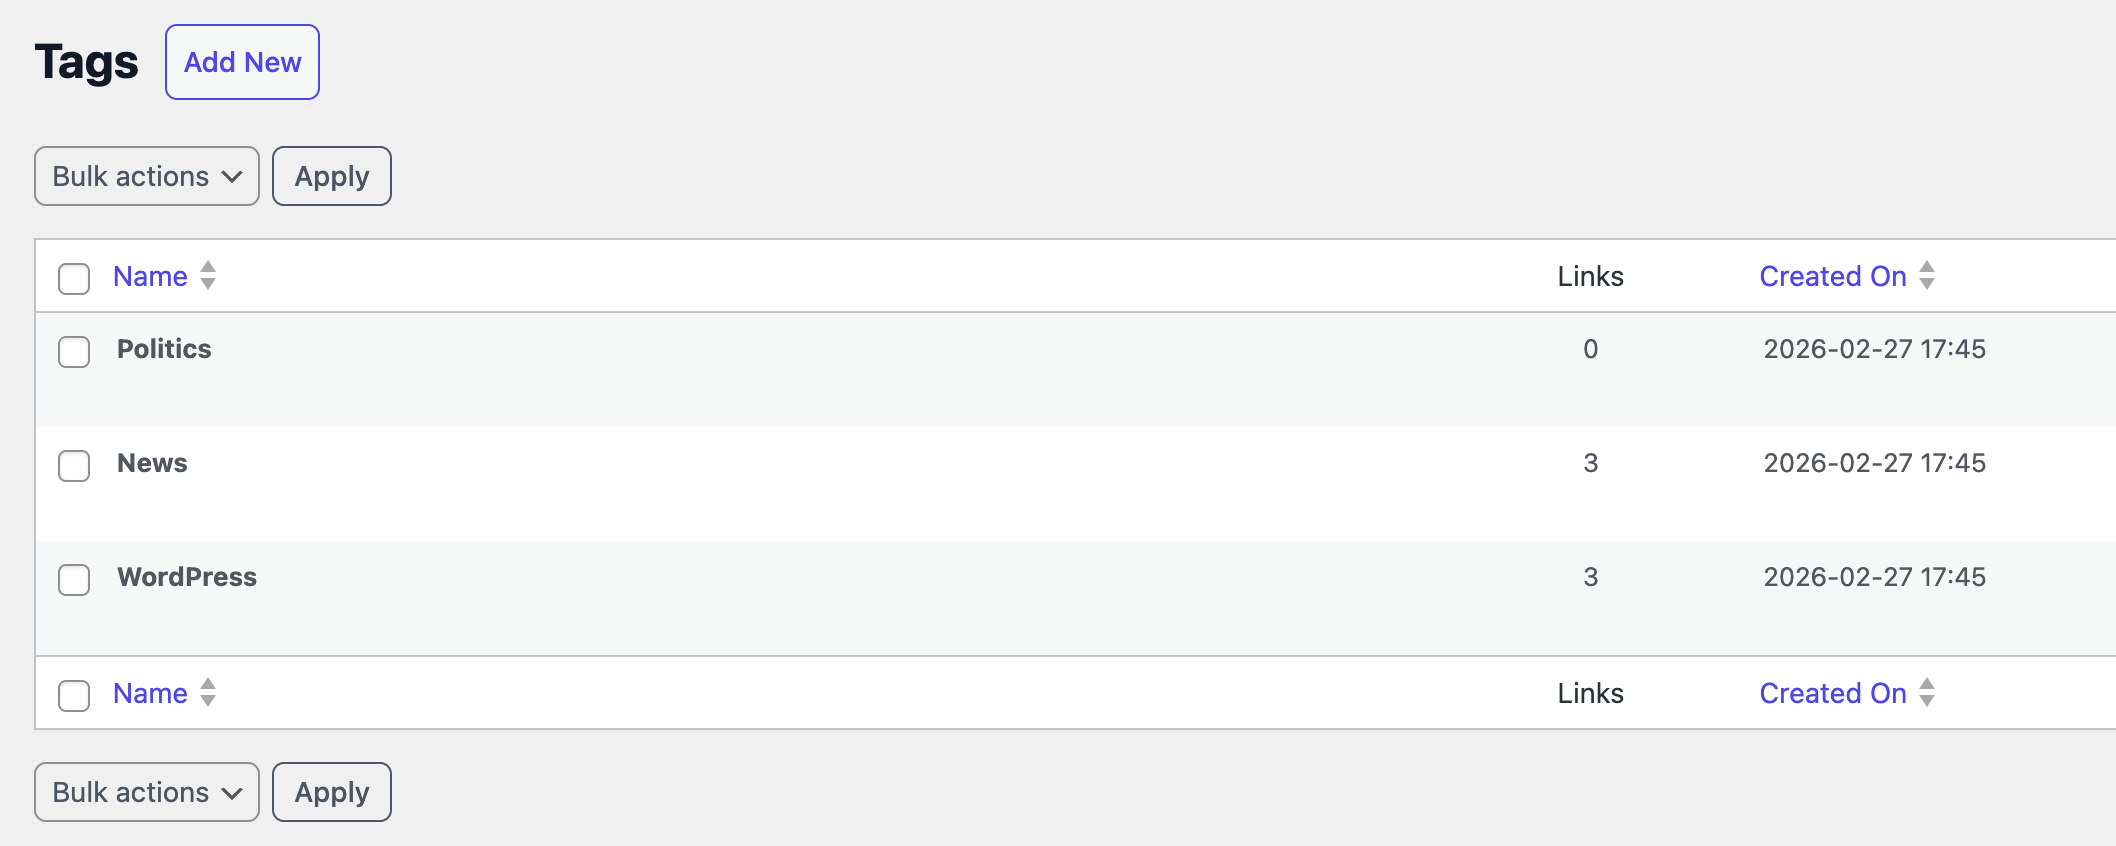
| Column | Description |
|---|---|
| Name | Tag name with Edit / Delete row actions |
| Links | Number of short links assigned to this tag |
| Created On | Date the tag was created |
Actions available:
- Edit — Update name, description, or color
- Delete — Removes the tag and all its link associations
- Bulk delete — Select multiple tags and delete them at once
- Search — Search tags by name
Deleting a tag does not delete the links — it only removes the tag and its associations.
REST API
Refer to the REST API documentation for more details on authentication, request formats, and error handling.
Notes & Limitations
- Tags require URL Shortify PRO.
- There is no limit on the number of tags you can create.
- One link can have multiple tags; one tag can be assigned to multiple links.
- Deleting a link automatically removes its tag associations.
- The
manage_tagscapability controls who can access and manage tags via both the admin UI and REST API.