More Features
How to Set an Expiry Date for Short URLs in URL Shortify
Overview
Configuring expiration dates for short links in URL Shortify helps manage time-sensitive content, enhance security, and simplify link administration. This resource explains how to configure and maintain expiration settings for short URLs and describes what occurs when links expire.
Why Use Expiry Dates?
- Time-Limited Campaigns — Perfect for temporary promotions, product launches, or event pages requiring limited availability
- Link Management — Maintain an organized URL library and prevent access to obsolete links
- Security — Minimize risks associated with older URLs being misused or distributed inappropriately
Step-by-Step Guide
Step 1: Access Your WordPress Dashboard
- Log in to your WordPress dashboard
- Navigate to URL Shortify > Links using the left-hand menu
Step 2: Edit an Existing Link or Create a New One
- To modify an existing link's settings, locate it and select Edit
- To generate a new short URL, click Add New Link
Step 3: Scroll to the "Expiration Date" Setting
- In the link editor, scroll down to the Expiration Date section
Step 4: Set the Expiry Date and Time
- The Expiration Settings offer options to configure a date and time for link expiration
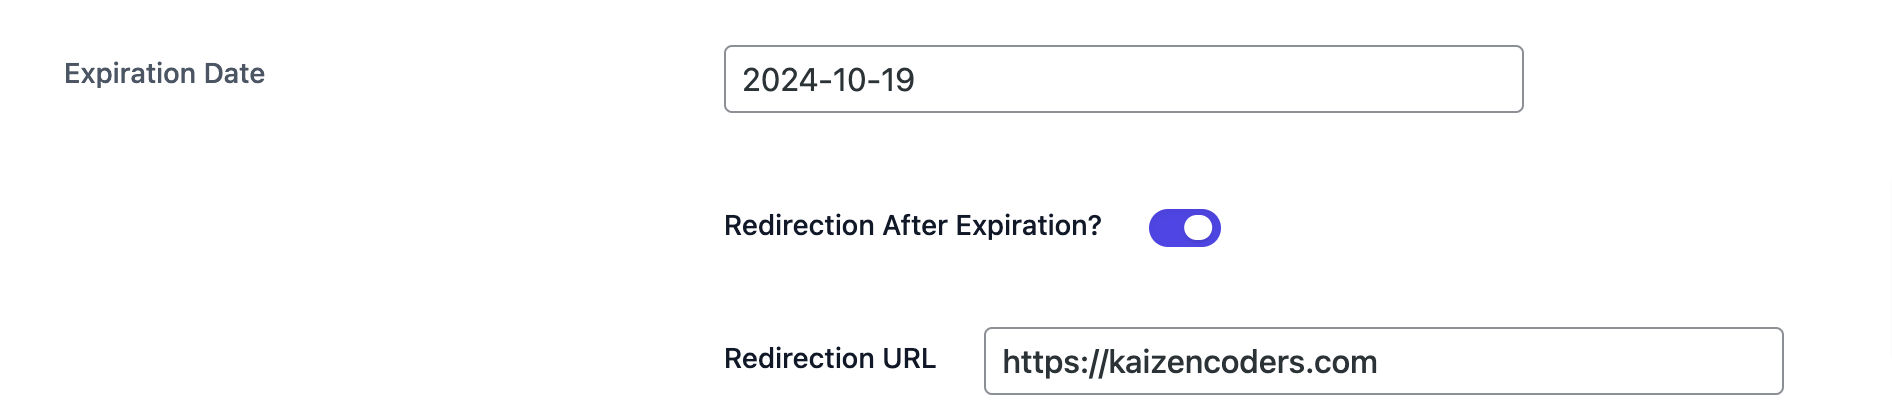
Step 5: Choose What Happens After Expiry
- Define the post-expiration behavior:
- Redirect to a specific page: Designate a custom URL where users will be directed after the short link expires, such as a campaign conclusion page, your homepage, or another promotion
- Without a custom redirect, default behavior applies (typically a 404 page)
Step 6: Save Your Settings
- After configuring the expiry date and post-expiry actions, click Save to finalize the changes
What Happens After the Short Link Expires?
Once the expiration date passes, visitors accessing the short URL will be redirected to your specified destination, ensuring relevant content delivery and maintaining control over expired links.
Example Use Cases for Expired Links
- Promotions: Direct users to a sale conclusion page or current promotion
- Events: Guide visitors to registration closure notifications or the event website
- Security: Disable sensitive links after a defined period to prevent unauthorized distribution
Additional Tips
- Modify or remove expiration dates anytime by accessing link settings
- Periodically review expired links to confirm proper redirection
FAQ
Can I change the expiry date after setting it? Yes, editing the link and updating the Expiration Settings allows modifications anytime.
What happens if I don't set a redirect URL after the link expires? Without a custom redirect, the default behavior will occur, which may result in a 404 error page.
Can I apply an expiry date to bulk links? Yes, expiration dates can be assigned to multiple links simultaneously.
This feature is available in URL Shortify PRO.*